The Mid-Week Sanitation Hack
Sanitiser should be a daily occurrence for most of us now thanks to 2020. The simple, quick drying yet bacteria busting liquid is also fantastic to use on our beauty tools.
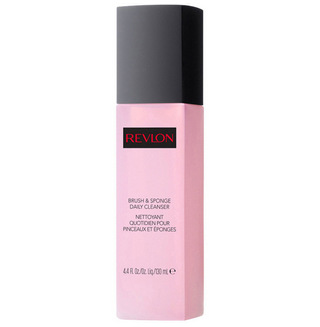
In the attempt to avoid brush bacteria when you don’t have the time to wash, rinse and dry your utensils, a specific sanitiser for your makeup tools is a fabulous hack. This clear liquid formulation gets the job done, and in super speedy time.
This quick drying spray is a favourite in the kits of make-up artists world-wide due to it’s instant germ ridding powers. When switching between painting the faces of a few, it’s crucial to ensure safety is upheld (especially around the eye area). This also translates for those of you who may be prone to sharing your tools with friends or lovers, make sure you have a sanitising spray in your cosmetic bag to keep it hygienic!
The solution itself is usually alcohol-free, and odourless. Many of our favourites are gentle enough to spray on synthetic and non-synthetic fibres, and won’t interfere with the longevity of your tools.
Simply spray onto the brush or blender, ensuring the utensil is adequately moistened, and wait for the solution to absorb before using for your make up application.
Perfect for on the go, or if you’re touching up or in the morning when your brush is looking a little worse for wear, these sprays are an absolute must-have for makeup experts and novices alike!
The Sunday Deep Clean
For when you have some time to dedicate to a proper clean of your tools, we recommend this weekly, you must rely on a specific makeup tool shampoo.
The main difference between a cleansing spray (sanitiser above) and a brush shampoo, is that the latter contains a foaming agent that rids the brush or sponge of everything that has been absorbed into it. This foaming element will also help get into each tiny nook and cranny to ensure a thorough tool.
If you’re looking for an analogy, a sanitising spray is the equivalent of your in-between-washes like dry shampoo, whereas the deep clean is your double shampoo once or twice a week.
How to clean your kit? We thought you’d never ask. Wet the bristles of your brush or beauty blender with lukewarm water, avoiding the end of the bristles that are attached to the handle.
Apply a small amount, about a drop or two, of your preferred cleanser (we’ve listed the best on the market below), to your palm or a cleansing palette (more on this below).
Gently massage the solution through the tool on the surface you’re using to help clean. The trick is to be very gentle and not to fully submerge the brush into any liquid. When you introduce water or cleanser into the core of the brush the adhesive sticking the bristles together starts to disintegrate, and your poor brush won’t stand a chance.
You can fully submerge your beauty blender into the water, and squeeze it with all your might to get the excess solution out.
Bobbi Brown Conditioning Brush Cleanser 100ml, $28 – available at Adore Beauty
Cleansing Tools
Like any process, our glorious global beauty industry has supplied innovation when it comes to tools that help us when cleaning our beauty utensils.
Within the last decade, the introduction of rubber brush cleansing palettes, gloves and beauty blender cleaning devices have been speeding up this process for MUA and novices alike.
The purpose of the cleaning tool is to provide a malleable cleaning surface with textured bits to get into each nook and cranny of your brushes. The patterned area loosens up dirt, makeup build-up and impurities from deep within each bristle.
Use these tools for the most effective brush cleaning, alongside a shampoo or specific brush foaming cleanser, but please be careful to not apply too much pressure, or you risk damaging the head of your brush! Gentle circular motions is the best practice to ensure the integrity of your tool is kept.
The same goes for the Beauty Blender equivalent of the cleansing mat. The Beauty Blender Solid Cleanse Pro is a 2-in-1 cleansing system that combines a solid foaming cleansing product, with a small textured rubber matt to provide a thorough clean for your sponge and is gentle enough to ensure there are no tears in the process of cleaning.
Simply soak the blender in water, then the cleansing bar, before gently bouncing and rubbing the sponge onto the textured surface. Repeat this process as many times as necessary until running rinse water runs clear through your Beauty Blender.
Voila! Ready for air drying!
Sigma Beauty Spa Express Brush Cleaning Mat, $34.25 – available at Beauty Bay
BONUS HACK: Best Practices for Drying
After a careful and thorough rinse, hold your brush, bristle end down, and gently squeeze out any moisture that remains in there. Use a clean towel to press down and squeeze after your initial one. Using your fingertips, reshape the brush head back to its intended shape.
For the proper drying process, place your brushes on an edge of any surface with the bristle end hanging over the end. This allows the brush head to dry in the correct shape and ensures the excess moisture doesn’t end up in the adhesive section or wooden handle area.


